Overview
A series is a collection of related videos shown in a particular order that usually share a common theme. When creating a series, you must define the relationships between the series, its seasons, and the associated episodes.
A season is a group of videos that cover a set period of time. Each series can have one or more seasons.
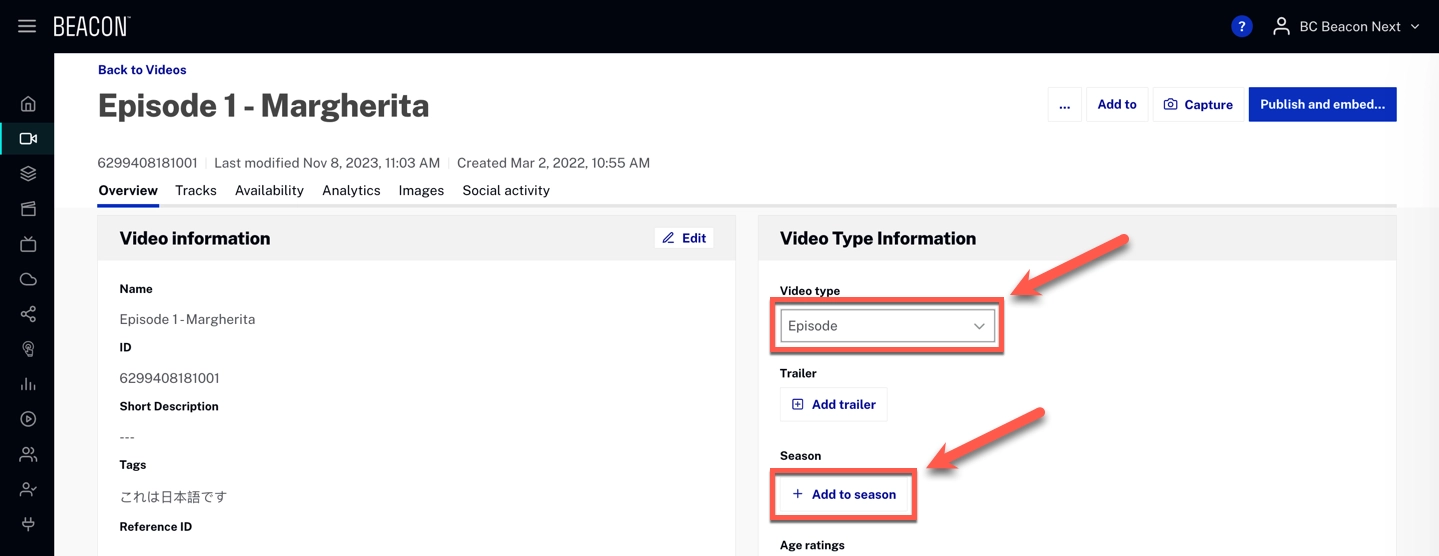
An episode is an individual video. You can think of this as a specific movie.
Relationship
The following diagram shows the relationship between a series and its seasons and episodes.
Creating a Series
To create a series with seasons and episodes, follow these steps:
- Log in to Beacon Studio.
- Open the Media module.
-
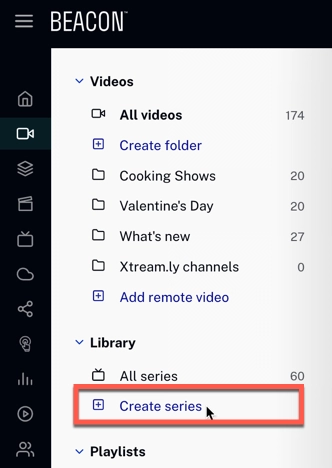
Click on Create series
-
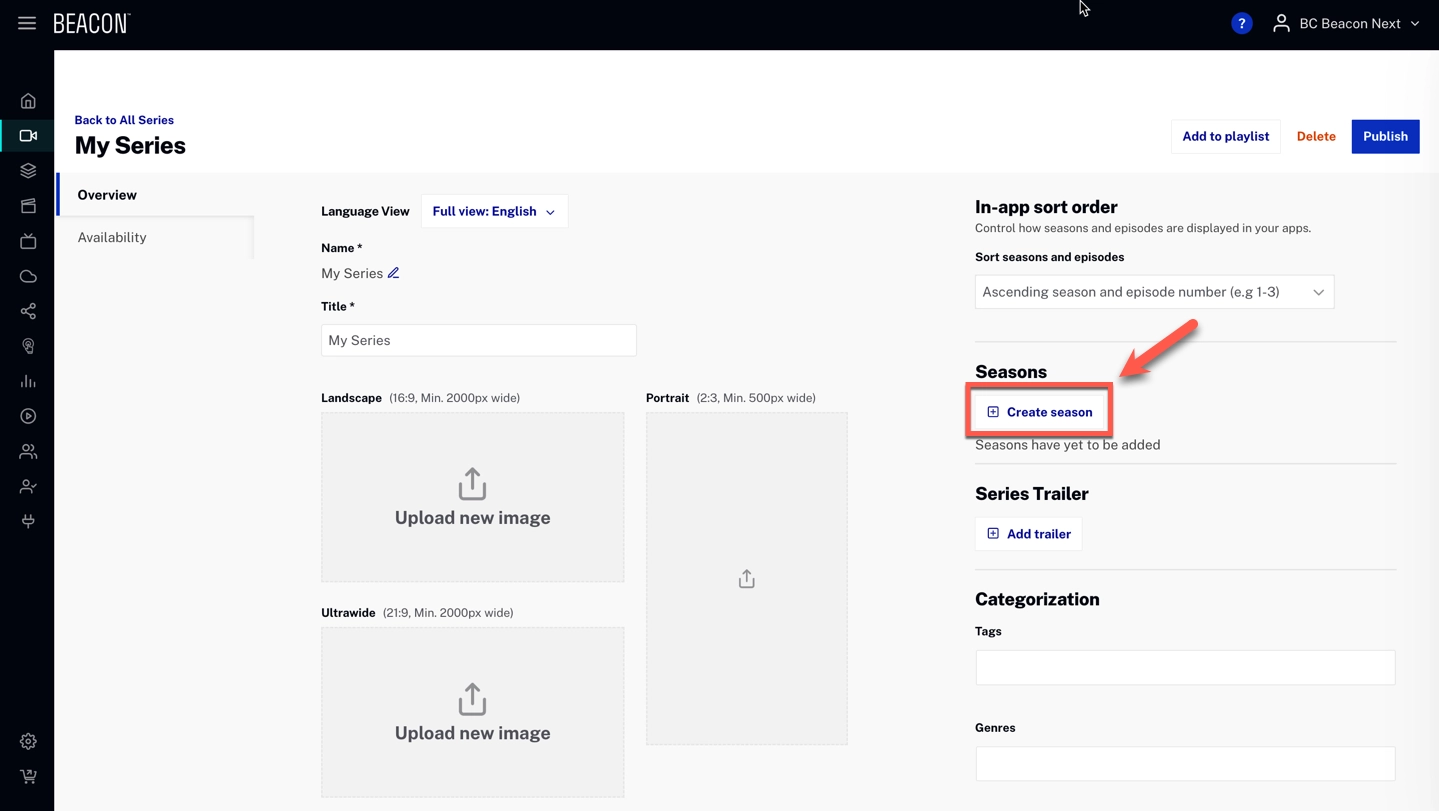
Fill in the Overview information.
Supply an image for the following (matching the requirements below) :
- Portrait Poster (required)
- Landscape Poster (required)
- Thumbnail
- Wide banner (required)
If not provided, the Thumbnail image will be generated from the Portrait Poster.
Image Requirements Portrait Poster JPEG image (2:3)
Minimum Width: 1000px Height: 1500px Maximum Width: 2000px Height: 3000px Landscape Poster JPEG image (16:9)
Minimum Width: 1000px Height: 563px Maximum Width: 4000px Height: 2250px Thumbnail JPEG image (4:3) Wide Banner JPEG image (21:9) Minimum Width: 1000px Height: 428px Maximum Width: 4000px Height: 1714px - Click
Adding a new Season
-
In your Series, Click Create Season
-
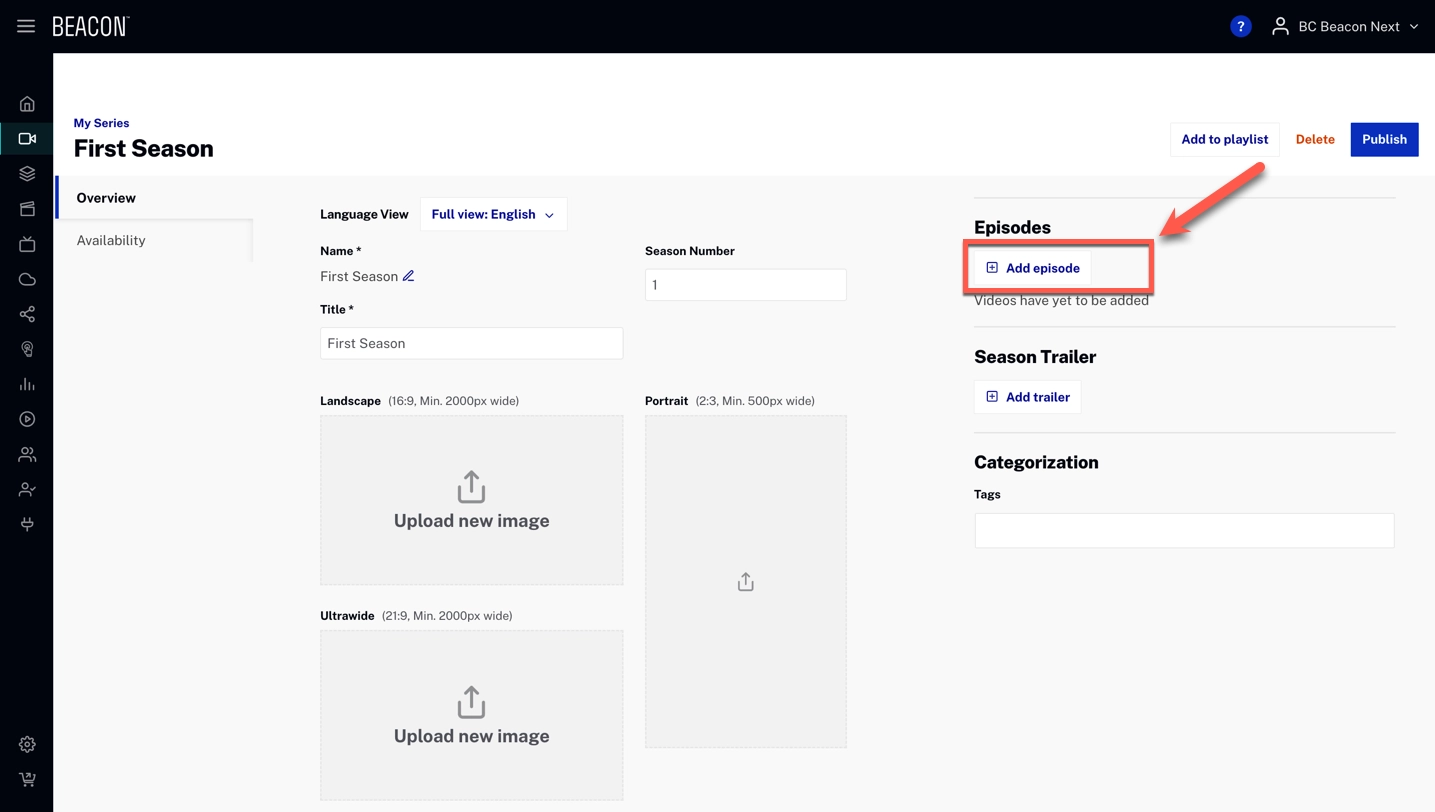
Fill in the Season's Overview information.

- Click
Adding new episodes
-
In your Season, Click Add episode
-
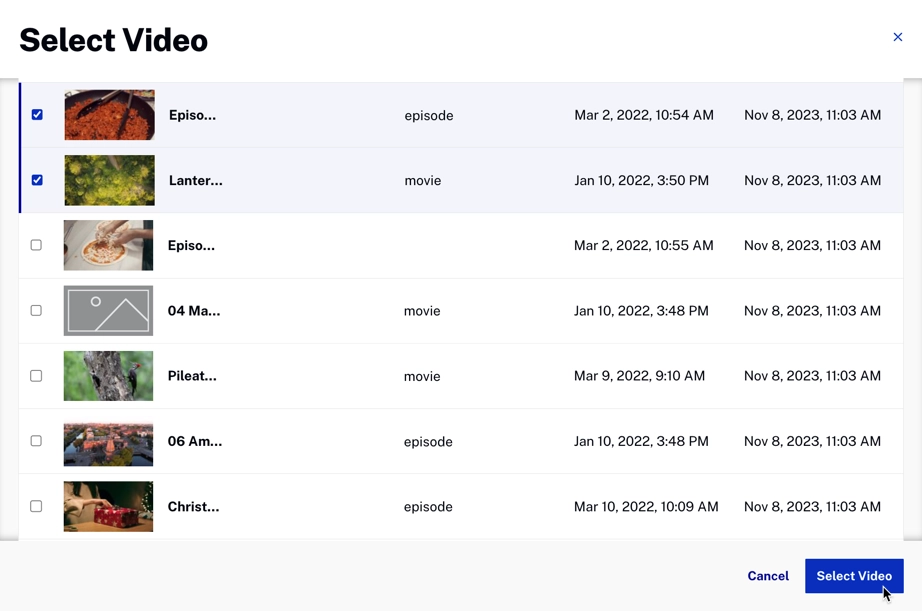
Select Videos for the Season
- Click
Additoinal considerations
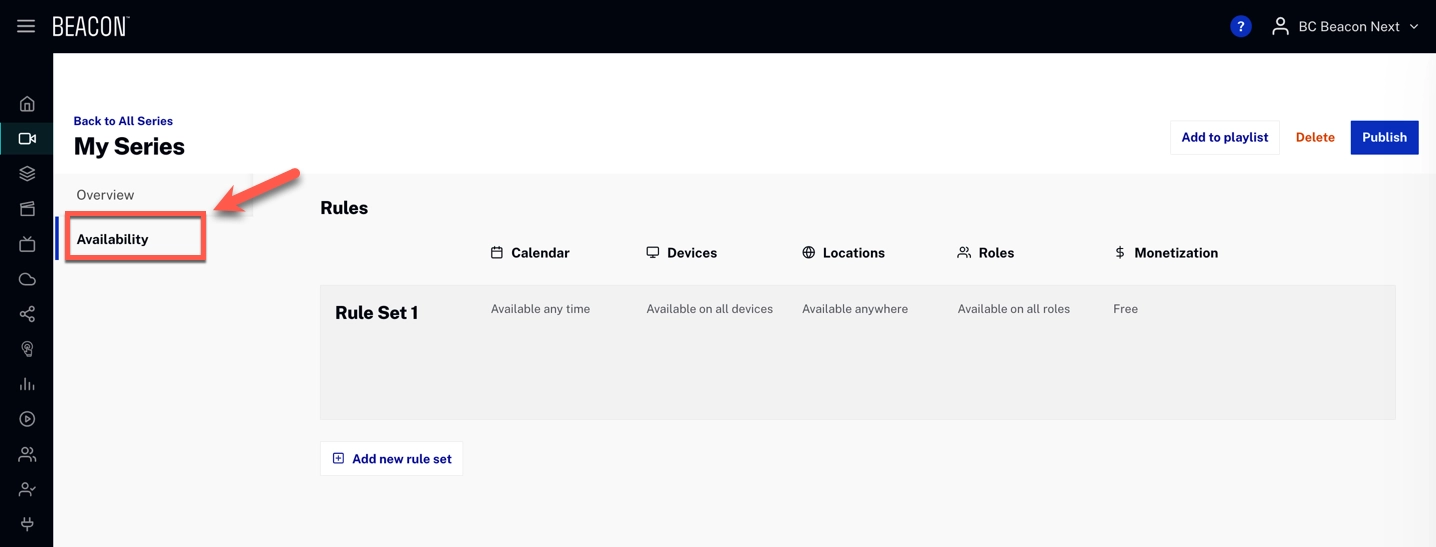
Availability
You can create availability rules for a Series or a Season. Click on the Availability tab to create a new rule set.
Changes not reflected
- Log in to Brightcove Beacon.
- Click on the Tools option (wrench icon) in the top menu.
-
Be sure the Ingestion option is selected on the left menu.
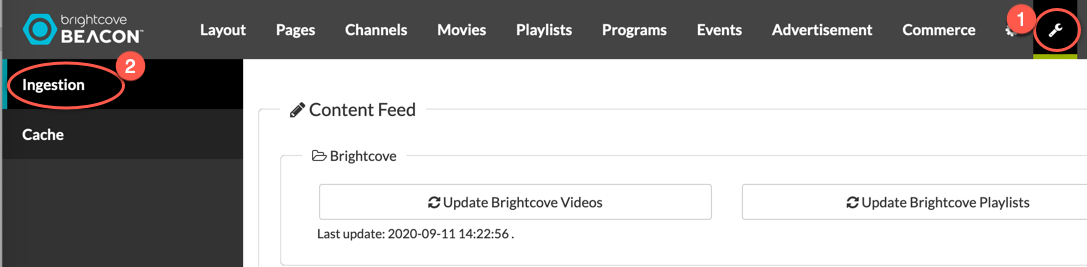
- Click the Update Brightcove Videos button to ingest the newly configured episode videos.
-
To make the videos immediately available in your apps, clear Brightcove Beacon's cache by clicking on the Cache option in the left navigation, then click the Cache Purge button.