Prerequisites
In Beacon Studio:
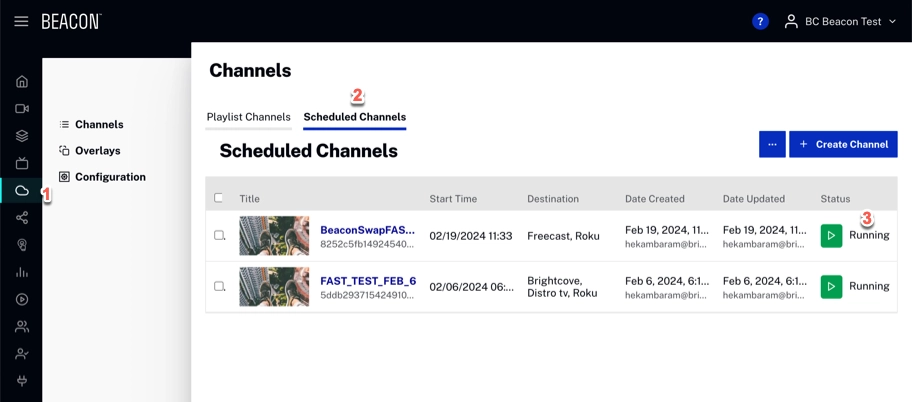
- Navigate to the Cloud Playout module. Then, fill the schedule with content and make sure it is in a start/running status.
- It is necessary to have the Channel ID.
- Video ID (via standard embed code).
- Ad Config ID .
Navigate to the Live Module for the channel. You will need:
In Beacon Classic:
- Login to Beacon Classic.
- Navigate to Advertisement.
- Click Add New Configuration.
- Create Advertisement as SSAI with Live Ad Config ID.

ad-conf-id Click Create New Advertisement.
- Navigate to Channels.
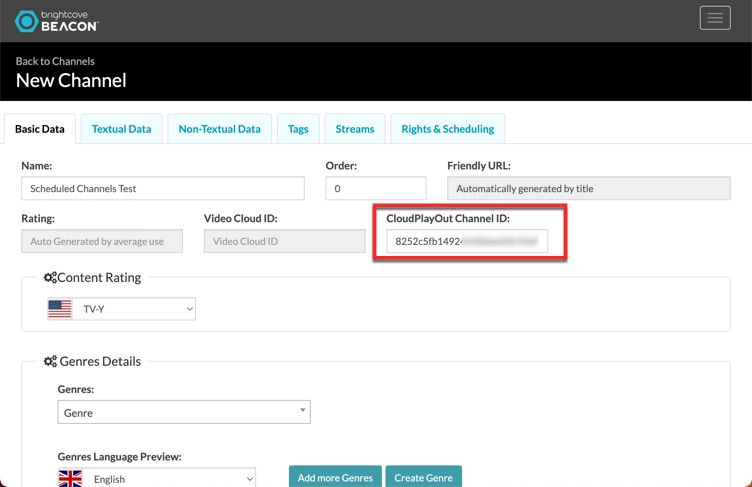
- Click the Channel. It's sent to Basic Data. Localize CloudPlayOut Channel ID and fill it with the Channel ID. Click Update Channel.
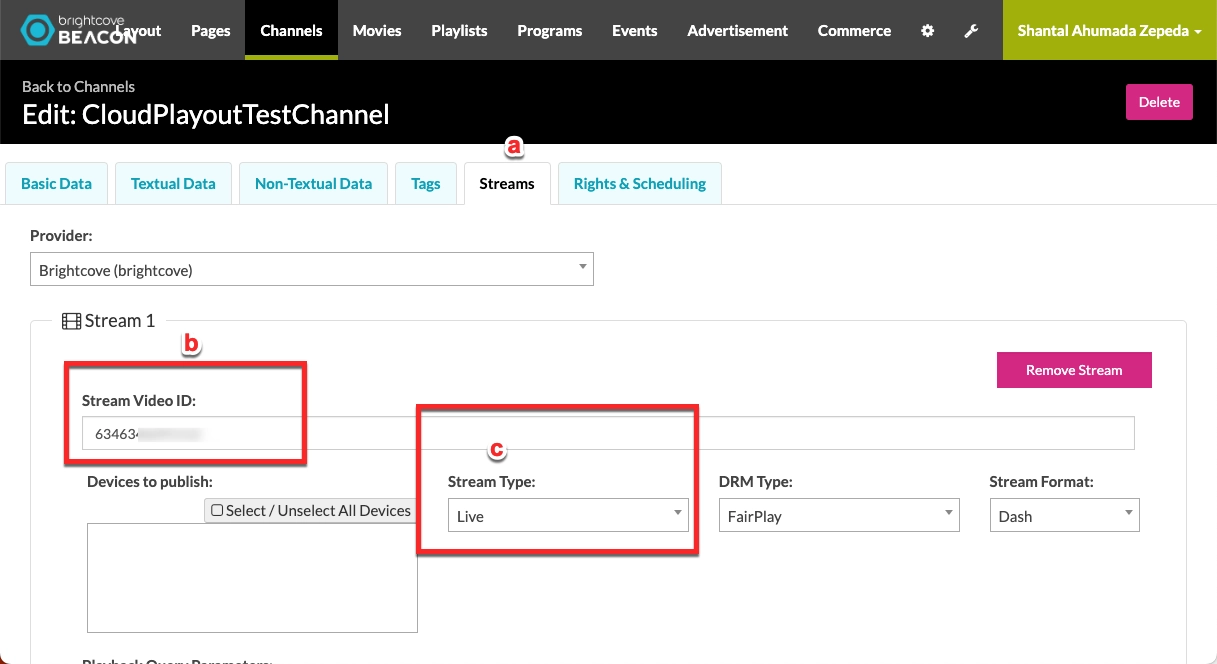
channel-ID - Navigate to streams and add the Stream Video ID. In Stream Type select Live.
streams Click Add new stream.
- Navigate to Rights & Scheduling. Set the AVOD and Advertisement Configuration created.
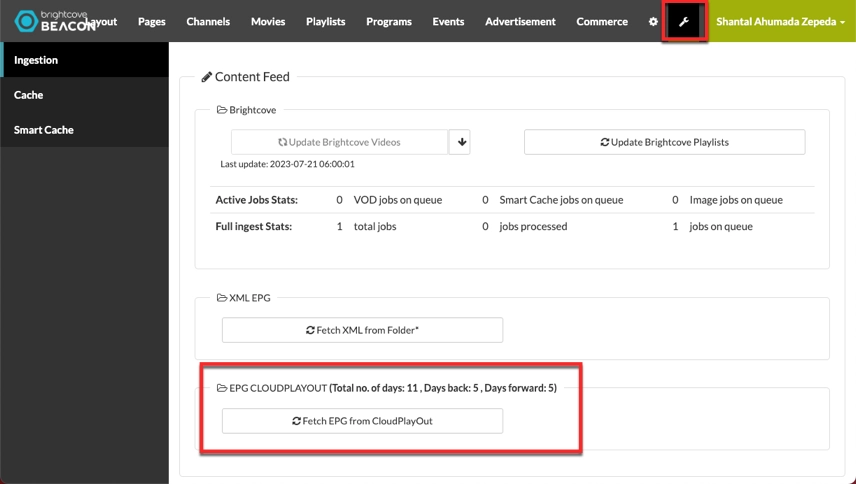
- Click to configuration and fetch EPG.
ferch-epf - Go back to Channels, click EPG and click action to add the items.
Replacing an Existing Channel
In Beacon Studio:
- Navigate to the Cloud Playout module. Then, fill the schedule with content and make sure it is in a start/running status.
- It is necessary to have the Channel ID and Video ID (BC Live).
- Login to Beacon Classic.
- Navigate to Channel, then clock Basic Data.
- Change the CloudPlayOut Channel ID.
- Click Streams and change the Video ID.
- Go to the Advertisement Configuration and change to the new ID.
- Refresh the page in Beacon.
- Click to configuration and fetch EPG.
ferch-epf - Go back to Channels, click EPG and click action to add the items.