Overview
An SVOD plan defines how a particular set of videos can be purchased by your apps' customers. When creating the package you can, for example, configure the following:
- The billing frequency
- Set if ad supported, and the advertising configuration to use
- Payment methods
- Maximum number of streams that can be played simultaneously by a user with the package
- Start and end dates when the package can be purchased
- Permitted devices and geo-locations where the package can be bought
Setup
Before you create an SVOD plan in Beacon Classic, follow these setup steps:
-
To create a new SVOD plan or to change the pricing for a SVOD plan, you must contact your payment processor.
-
Open a Brightcove support ticket, so that the Brightcove OTT Delivery Team team can help you walk through the process, and help with availability options. Allow some time to work through the setup process.
Creating SVOD plans in Beacon Classic
Once you have opened a Brightcove support ticket as mentioned above, the Brightcove OTT Delivery Team will walk you through the following steps in Brightcove Beacon Classic:
-
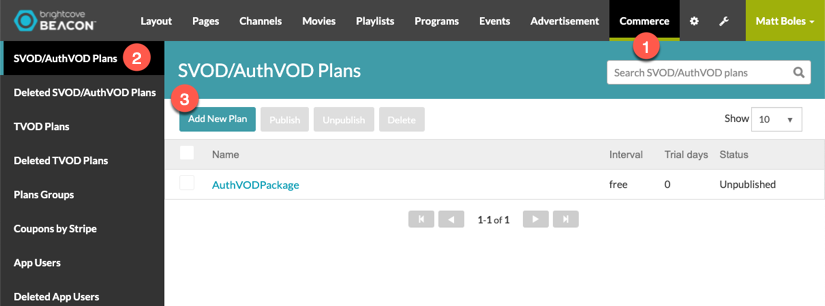
In Brightcove Beacon, select the Commerce tab, be sure SVOD/AuthVOD Plans is selected in the left navigation, then click Add New Plan .
-
For the Package tab, enter details for your SVOD Plan.
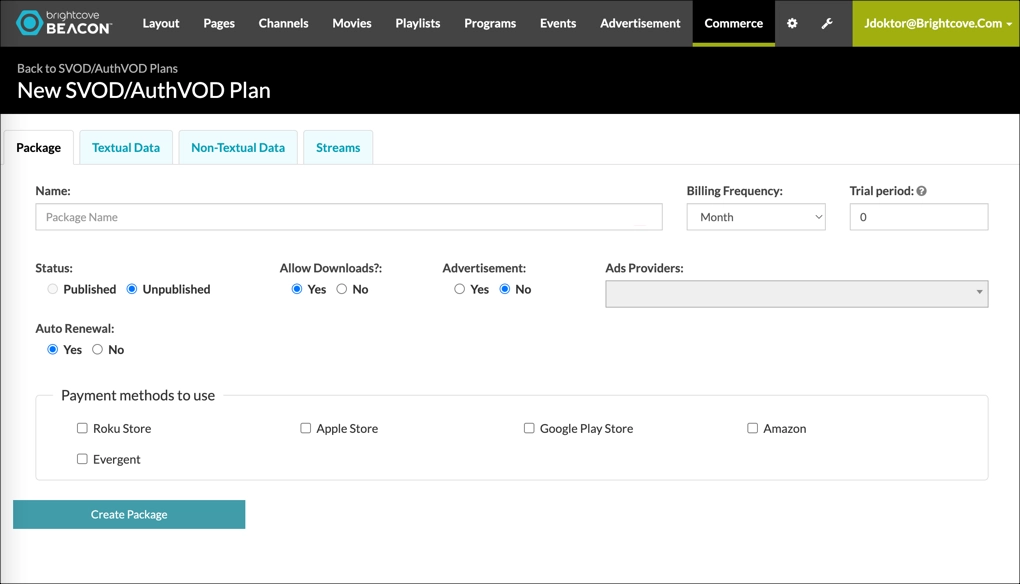
This table contains the fields you will find in the Package tab:
Field Required Description Name Yes Name of the SVOD package Billing Frequency [1] Yes Choose the billing frequency for this package.
Trial Period [1] Yes Set the trial period for this package. Enter 0 for no trial period. Status Yes Choose if you wish to have the package published so it is available for use. Note that you cannot publish the package until at least one payment method is selected. Allow Downloads Yes Set to Yes to allow content associated with this plan to be downloaded by the user for offline playback. For details, see the Offline Playback with Brightcove Beacon Apps document. Advertisement Yes Choose if you wish to use advertisements with this package. Ads Providers No If you have chosen to use ads in the previous step, choose the ad provider. This dropdown is populated with the advertisement configurations listed in the Advertisement section of Brightcove Beacon. Auto Renewal [1] Yes Select Yes if you want the subscription to automatically renew.
Select No if you do NOT want the subscription to automatically renew.Payment processors or paywalls Yes Note that for each method selected a section opens below the list of payment methods, which you must complete for each selected method.
Select one or more of the following types:- Amazon
- Apple Store
- Beacon Store
- Evergent
- Google Play Store
- Roku Store
- Stripe
-
If you are using Evergent, select Evergent to see paywall details.

Most of the detail fields are the same across the payment methods, except for the ID (Amazon ID, Apple Store ID, Evergent ID, etc). This table contains the fields for Evergent payment details:
Field Required Description Start Time Yes Schedule a starting date this package will be available End Time Yes Schedule an ending date when this package will no longer be available Devices to publish Yes Add the devices you wish to publish to. Select the Select / Unselect All Devices to see a list of available devices.
Permitted locations Yes Select the geo locations where viewers can subscribe to your content. If no restrictions enter World.
Denied locations No Select the geo locations where you DO NOT want viewers to subscribe to your content. Price [1] Yes Specify the price that users must pay to view content associated with this package. Currency [1] Yes Specify the currency type for the package price. Evergent ID Yes Evergent will send your Evergent ID to Brightcove to make the connection. - Click the Create Package button to save your current package configuration.
-
On the Textual Data tab, complete the following:
- Pack Name : Name shown to users.
- Headline : Headline shown to users, for example Holiday Special! .
- Click the Create Package button to save your current package configuration.
- On the Non-Textual Data tab, images are NOT used by the apps.
- Click the Create Package button to save your current package configuration.
- The Content tab is not for use at the current time.
-
On the Streams tab, complete the following:
- Max Streams : Maximum number of connected devices that can be streaming at the same time.
- Max Devices : Maximum number of connected devices that can have active connections.
-
Advanced Streams : Set this to Yes if you wish to customize the rights this package sets. The available changes are shown in the following screenshot:
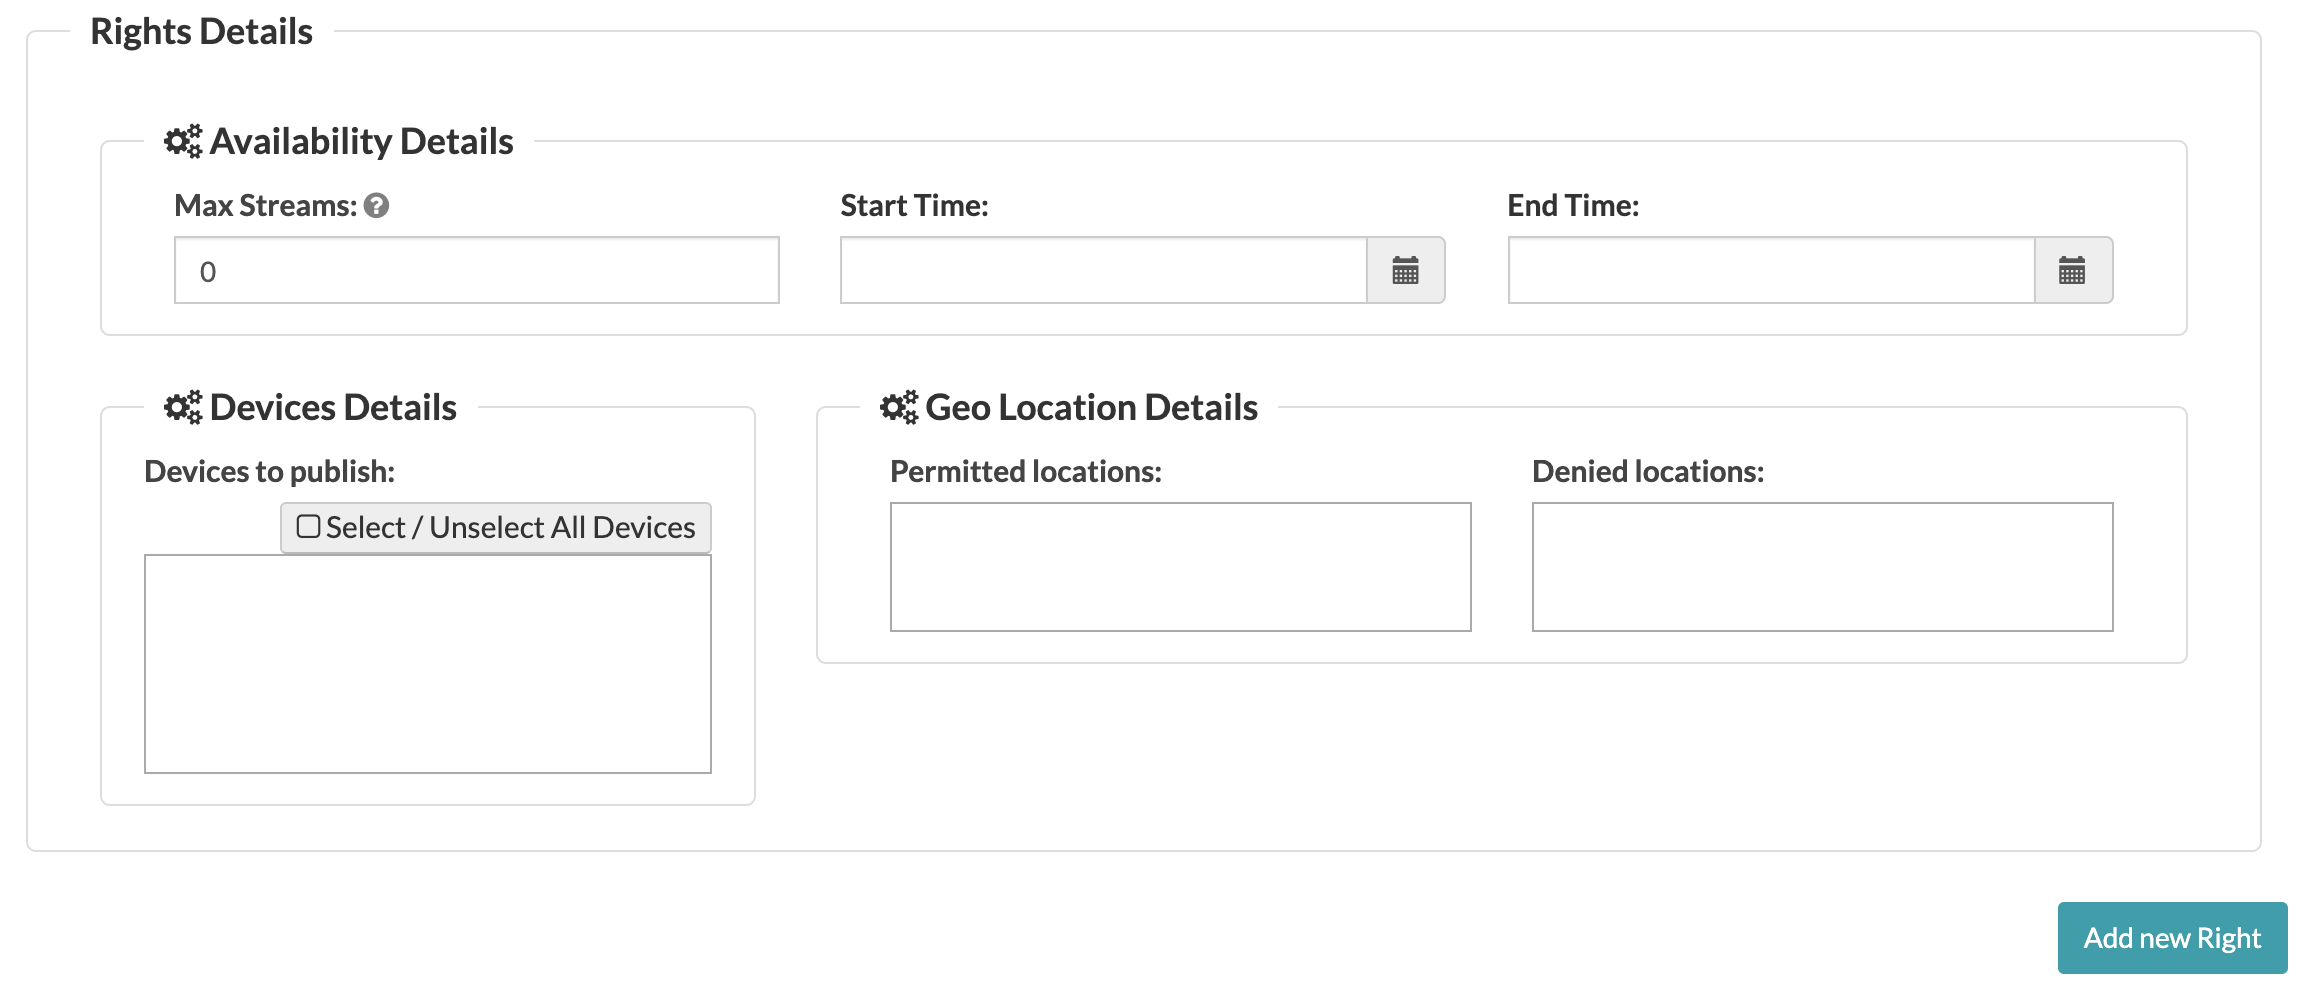
- Click the Add new Right button to save your newly configured, customized rights.
- Click the Create Package button to save your current package configuration.
That's it for the package creation!
Unpublishing or deleting a package
If a package is no longer needed you have two options:
-
Unpublish: You can unpublish a package that is needed again. For instance, you have a special package associated with a holiday that you use year after year. This is a good use case for unpublish.
-
Delete: Deleting a package is not recoverable. Deleting a package means that ALL viewers with subscriptions will lose entitlements, even if the store says they have a subscription or if it just renewed on the store.
There are two places you can unpublish/delete a package:
- From the SVOD/AuthVOD Plans section check the package(s) you wish to unpublish/delete then click the appropriate button.
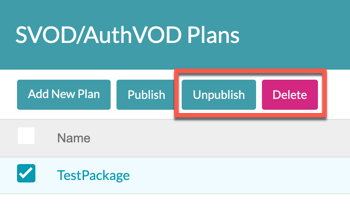
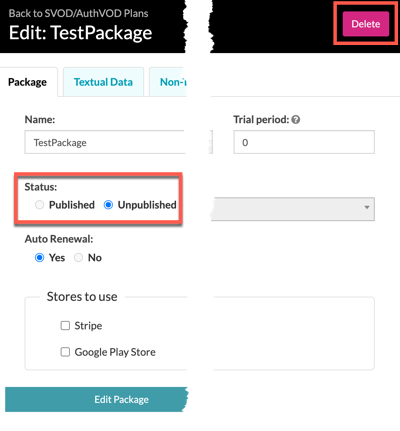
- If you are editing the package, from the Package tab you can both unpublish and delete. Use the Status to unpublish or the Delete button to delete.
Creating a Stripe Coupon
Coupons can be created to provide a discount, either a fixed monetary discount or a percentage discount, that can be applied when purchasing a package.
-
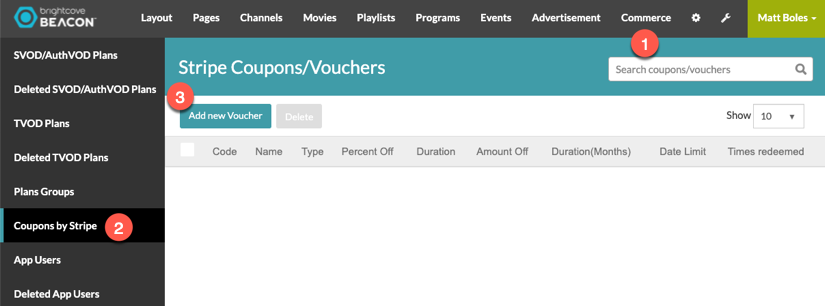
In Brightcove Beacon, select the Commerce tab, then click Coupons by Stripe and finally click Add New Voucher.
-
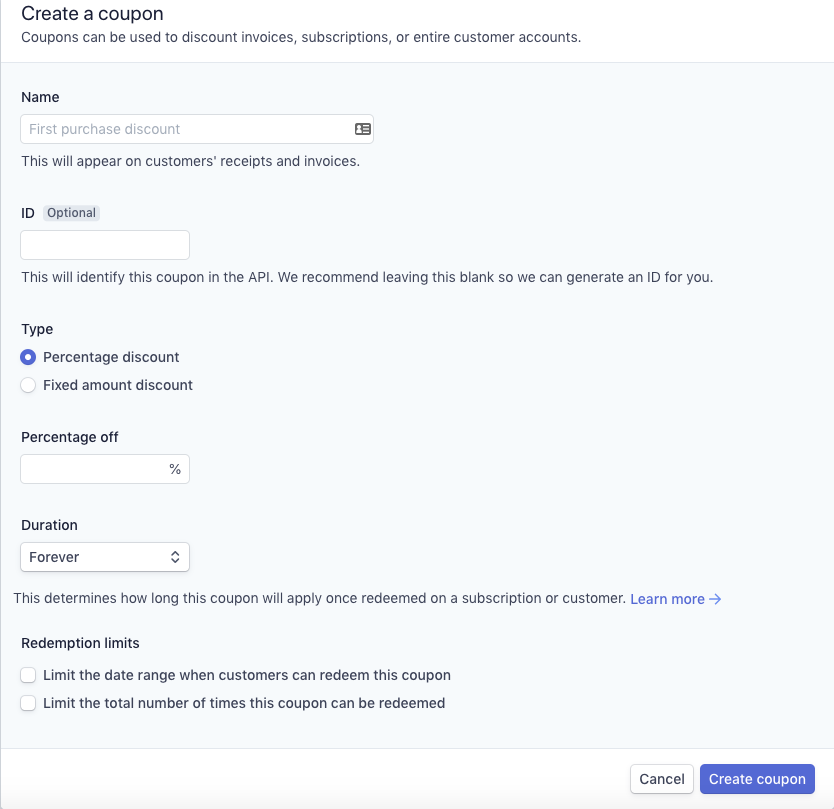
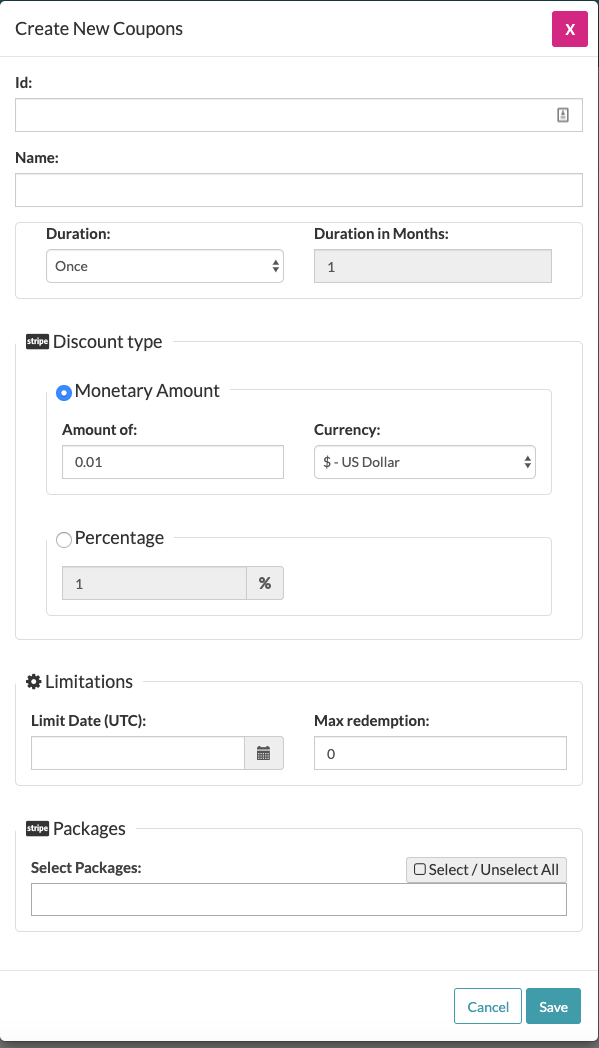
On the Create New Coupons form (screenshot below), complete the following:
- Id : Code that viewers enter in the Brightcove Beacon app to use the coupon
- Name : A friendly name for the coupon that can be displayed in invoices
-
Duration : Choose from Once, Forever or Repeating;
If Repeating is selected, then set the number of months it can repeatedly be used. -
For
Discount type
select one of the following:
- Monetary Amount: Enter the value of, and currency for, the coupon
- Percentage: Enter the percentage of discount the coupon carries
Example: If the discount is 3 months free, then set the Duration to Repeating with 3 months and set the Discount type with Percentage of 100%
- Limit Date (UTC) : Select the last date the coupon can be used
- Max redemption : Enter the maximum number of redemptions for the coupon; for instance only 50 customers can redeem the coupon
-
Select Packages : Select the packages to which the coupon can be applied; if you do not select a package the coupon can be applied to all packages
Example: The coupon is only valid if you purchase the yearly subscription
-
Be sure to click the Save button to save your new coupon.
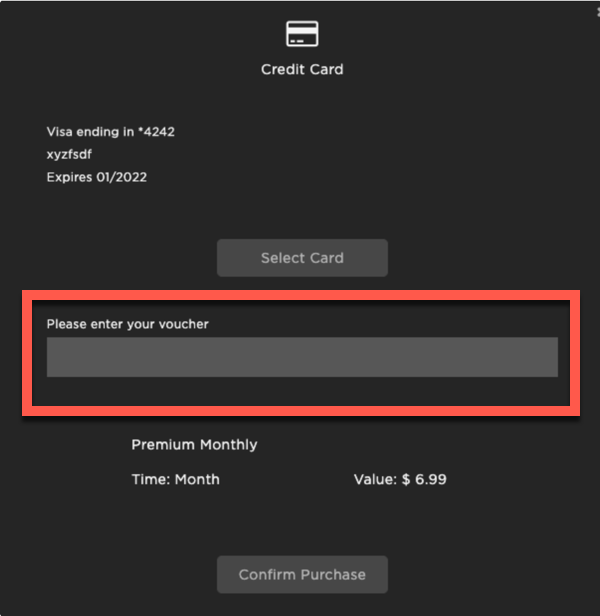
In the Brightcove Beacon app when a package purchase takes place, viewers are able to enter the coupon Id:
Alternatively, you can create coupons directly in your Stripe account, and then use them in Brightcove Beacon. For details, see Stripe's Discounts for subscriptions document.