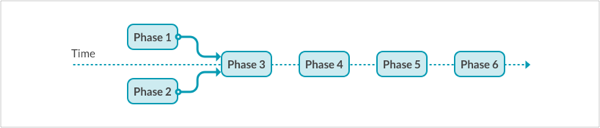
Implementation Phases
Introduction
In this document, a high-level look at the entire process of implementing Brightcove Beacon is provided. It will emphasize that you as a customer have a number of tasks to perform before meeting with a Brightcove representative to build your device apps.
Overview
-
Phase 1: Prepare for Brightcove Beacon Experience Creation
Later in the Brightcove Beacon implementation process (Phase 4), you will build the Brightcove Beacon Experience. You will do this while working with a Brightcove representative. At this time you will need to have some design artifacts ready, as well as decisions made on platforms to which you wish to deploy, monetization strategy, advertising strategy, etc.
END RESULT : A collection of resources and strategies defined for use when meeting with a Brightcove representative to build the Brightcove Beacon Experience.
-
Phase 2: Establish Relationships with 3rd Party Vendors
There are numerous relationships with 3rd party vendors you need to establish before meeting with a Brightcove representative to build the Brightcove Beacon Experience. This would include contacting the vendors for the platforms to which you choose to deploy an app, an advertising server provider, Stripe for online payments if launching web and/or Smart TV apps, etc. It is VERY IMPORTANT that this process starts as early as possible as to not cause delays at time of device app submission.
END RESULT : Accounts created with all desired 3rd party vendors for use when meeting with a Brightcove representative to build the Brightcove Beacon Experience.
-
Phase 3: Create Your Application Design
Two parts of your application design are done here. The first is planning what videos will be available to customers and how to group and order them. In essence, your information architecture. The second part consists of choosing how specific screens of your app should look, given a number of choices.
END RESULT : Two spreadsheets, created when working through the appropriate docs, are filled in and ready for submission to Brightcove personnel when the Brightcove Beacon Experience is ready to be created..
-
Phase 4: Ingest or Add Content and Configure Your Brightcove Beacon Experience
Here you will use the Brightcove Beacon Administrative Console to configure your experience. Here you will import media assets from Video Cloud, and add other content. Configuration of monetization and layout are also done. At this point not ALL content needs be added, but at least representative content for thorough testing is needed.
END RESULT : Content is added, and configuration is performed, via Brightcove Beacon.
-
Phase 5: Create Device Application(s) from Your Brightcove Beacon Experience
You will work with a Brightcove representative to build the Brightcove Beacon Experience. The work done in Phases 1-4 is utilized to create the experience. From the Brightcove Beacon Experience, the device apps are built. At this point user acceptance testing is also done to be sure apps function as desired.
END RESULT : The device app files are created, tested and available for submission to desired vendors/stores.
-
Phase 6: Submit Your Device Application(s) to Corresponding Store(s)
At this point you have the applications for your desired platforms in hand, as well as configuration performed, so you can now submit the applications.
END RESULT: Device apps appropriately submitted and viewers begin to use the apps on vendor approval.
In this section, the phases are introduced, briefly defined and the result of the phase is stated. Later in the document, checklists, where appropriate, are provided to help you prepare for each phase.
Phases timing
Note that Phases 1 and 2 can and should be executed simultaneously.
Of course, once the device applications are launched, you can continue to configure and add content to Brightcove Beacon without having to resubmit your device applications to their respective stores.
Details - Phase 1: Prepare for Brightcove Beacon Experience Creation
Following are tasks to complete for Phase 1:
| Determine device app platforms required and any priority platforms | |
| Determine monetization strategy | |
| Determine if any custom user authentication services are needed | |
| Obtain your branded color(s) and logos for building the experience and for device specifications | |
| Attend Video Cloud training - Webinar or Training on Demand | |
| Ingest media assets into Video Cloud; you will need a minimum of 40 videos, and create 3 to 5 playlists that use those videos | |
| Create the required custom fields in Video Cloud; see the Video Cloud Custom Fields document for further details | |
| Determine analytics requirements | |
| Determine restricted geo-locations, if any |
Details - Phase 2: Establish Relationships with 3rd Party Vendors
Following are tasks to complete for Phase 2:
| Determine ad strategy and establish relationship with appropriate vendor | |
| Establish relationship with Stripe for online payments, if launching web or Smart TV device apps. Other platforms have a payment process built in. | |
Set up store accounts and confirm credentials. Vendors could include
but are not limited to:
|
Details - Phase 3: Create Your Application Design
You need to think through how you want your device applications to appear to your customers. In this phase you should work though the two documents:
- Creating Your Application Design - Information Architecture
- Creating Your Application Design - Layout Options
After working through these two documents you will have two spreadsheets, one created in each document, that you will give to Brightcove personnel when it is time to create the Brightcove Beacon Experience (Phase 4). The information in the two spreadsheets details the videos presented to users, including how they are grouped and ordered. Also specific screen layouts are selected.
Details - Phase 4: Ingest or Add Content and Configure Your Brightcove Beacon Experience
You may have done other testing and configuration, but in this phase you want to complete configuration. You don't have to have ALL content added, but for testing purposes be sure you have representative content for all types of media you will be using. You will use the Brightcove Beacon Experience Administrative Console to perform further configuration.
Details - Phase 5: Create Device Application(s) from Your Brightcove Beacon Experience
This phase takes place with the assistance of Brightcove personnel. The assets, vendor relationships, defined strategies, etc. from the first three phases are used by the Brightcove representative to build and do initial configuration of the Brightcove Beacon Experience. From this collaboration, the actual device app files are generated from Brightcove Beacon. Also in this phase, you can do acceptance testing on the device apps.
Details - Phase 6: Submit Your Device Application(s) to Corresponding Store(s)
For each vendor for which you have a device app, you must submit the app to the corresponding store. In Phase 2 you previously established a relationship with the vendor’s platform, so in this phase you submit the app to begin the approval process. In the Submitting Device Apps to Stores document you will find specific steps and links to appropriate vendor documentation for help in the submission process.