Introduction
Cookies are used to store data on a visitor's computer or mobile device. Cookies are commonly used and sometimes critical to a website's functionality. Cookies can be used to store large amounts of data, store personal data and track online activity so advertisers can target ads. Because of the negatives that are associated with cookies, regulations have evolved around them. The two most common are:
- California Consumer Privacy Act (CCPA)
- General Data Protection Regulation (GDPR) used in the EU and United Kingdom
This document is an introduction to get you started using OneTrust's Cookie Consent tool with Brightcove Beacon. Brightcove recommends using OneTrust for your Beacon cookie compliance needs.
The main sections in this document are:
- How OneTrust Cookie Consent works
- Implementation steps (comprised of four sections)
- What data is collected?
- Implementation architecture
How OneTrust Cookie Consent works
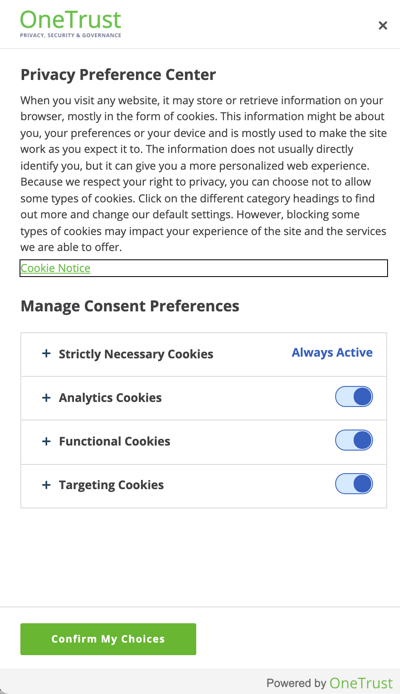
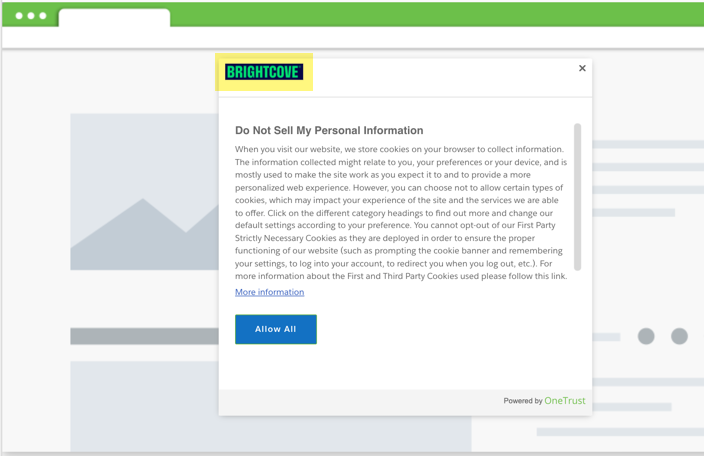
The end result of setting up OneTrust Cookie Consent is that a banner will appear in the Beacon App for geographic locations you choose. Here is an example of what the banner could look like (taken from OneTrust's site):

When a viewer clicks on the Customize Settings link in the banner, a Preference Center dialog appears. This allows your viewers to customize how cookies behave in their app:
OneTrust welcomes Beacon customers to contact them about the Cookie Consent product.
Overview of implementation process
There are a number of steps to implement OneTrust's cookie compliance with your Beacon app. Here is an overview of that process:
- Define the domain from where your apps will be served.
- Create templates that define your banner and preference center functionality and upload your logo for each template created.
- Create a geolocation rule group, which will act as a container for geolocation rules.
- Create three geolocation rules that:
- Define the regions in which the cookie compliance will be used.
- Define the template to be used with the geolocation rule.
- Define other specifications, like how often re-consent will need to be done.
- Assign geolocation rules to the domains from which your Beacon app is served.
- Generate the scripts that provide the actual cookie compliance in your Beacon app.
- Supply the scripts to Brightcove's OTT Delivery Team for implementation.
The major sections following in this document lead you step by step through the implementation process.
Define app domain
Later in the implementation process, you need to use the domain(s) from which your apps are served. The steps in this section define that.
- Log in to your OneTrust account.
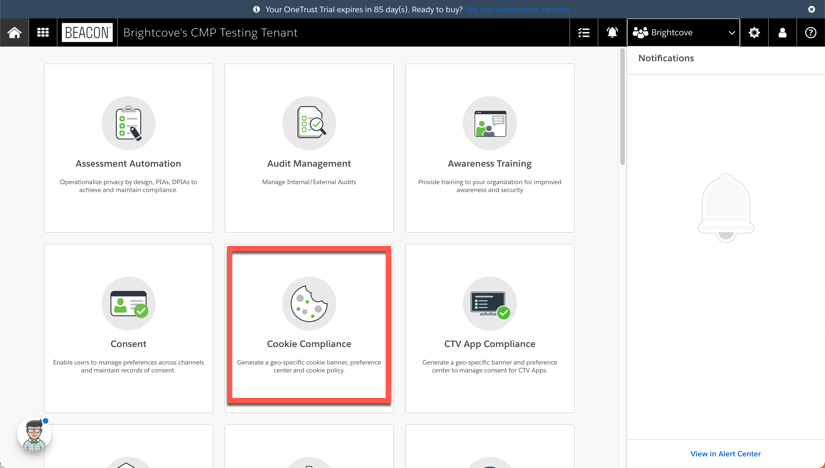
- From the Welcome page, click the Cookie Compliance option.
- To start the process:
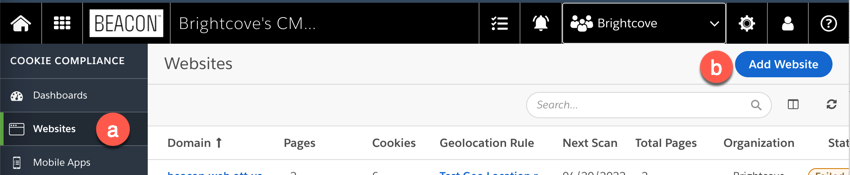
- In the left navigation, click Websites
- Click Add Website
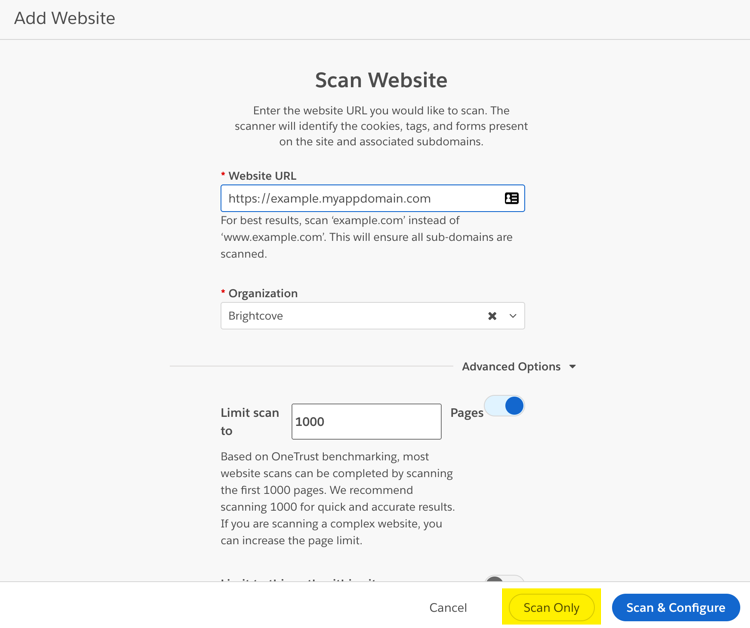
- Enter the Website URL from where your app will be served, which is supplied by your DNS provider. Enter the Organization, then click Scan Only.
- You will be returned to the COOKIE COMPLIANCE configuration page.
Create three templates
A template defines how your banner and preferences dialog appear, and function, for your users. In the following steps you will create two templates, one for CCPA, one for GDPR and a generic one for all other regions.
- In the left navigation, click Templates.
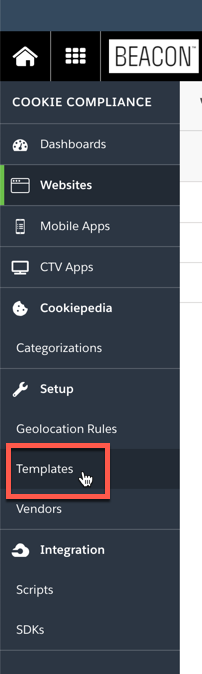
- Click Add New

- Select the CCPA Template (California) for the Framework.
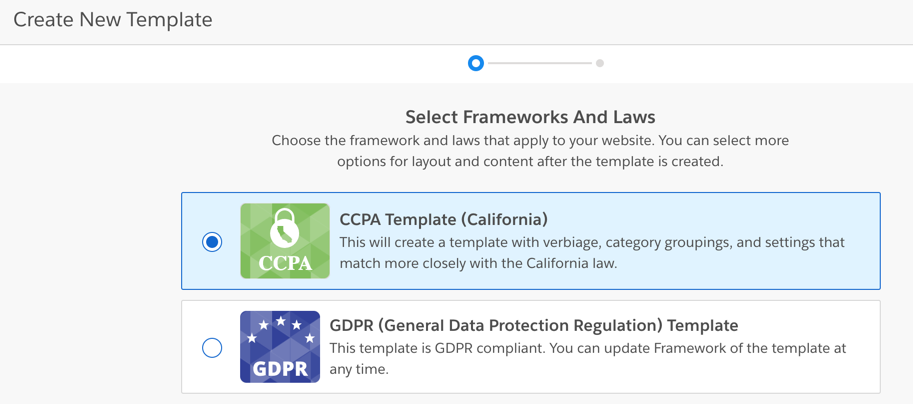
- Click Next.
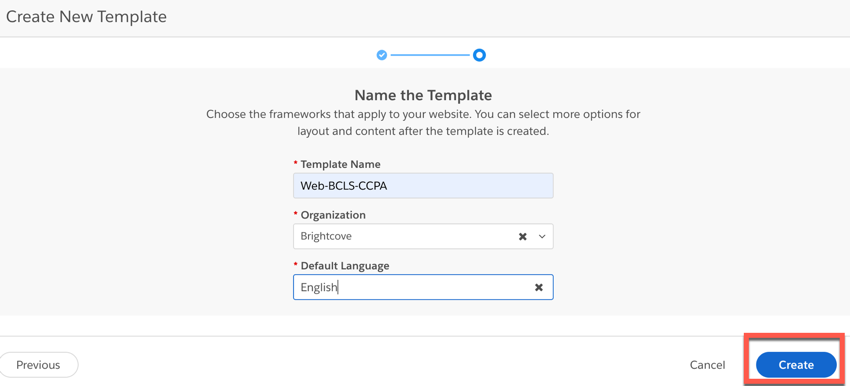
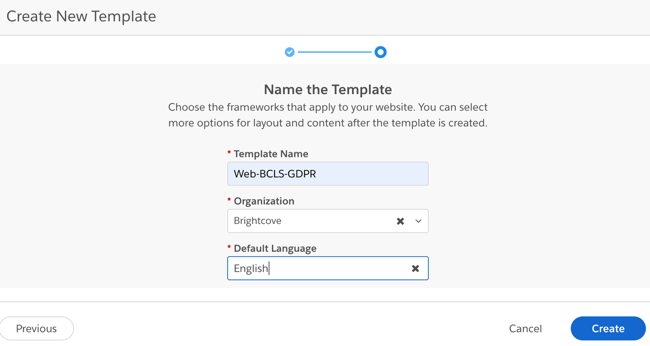
- Complete the form then click Create.
- The Template Details page opens to the Banner tab. Click Preference Center.
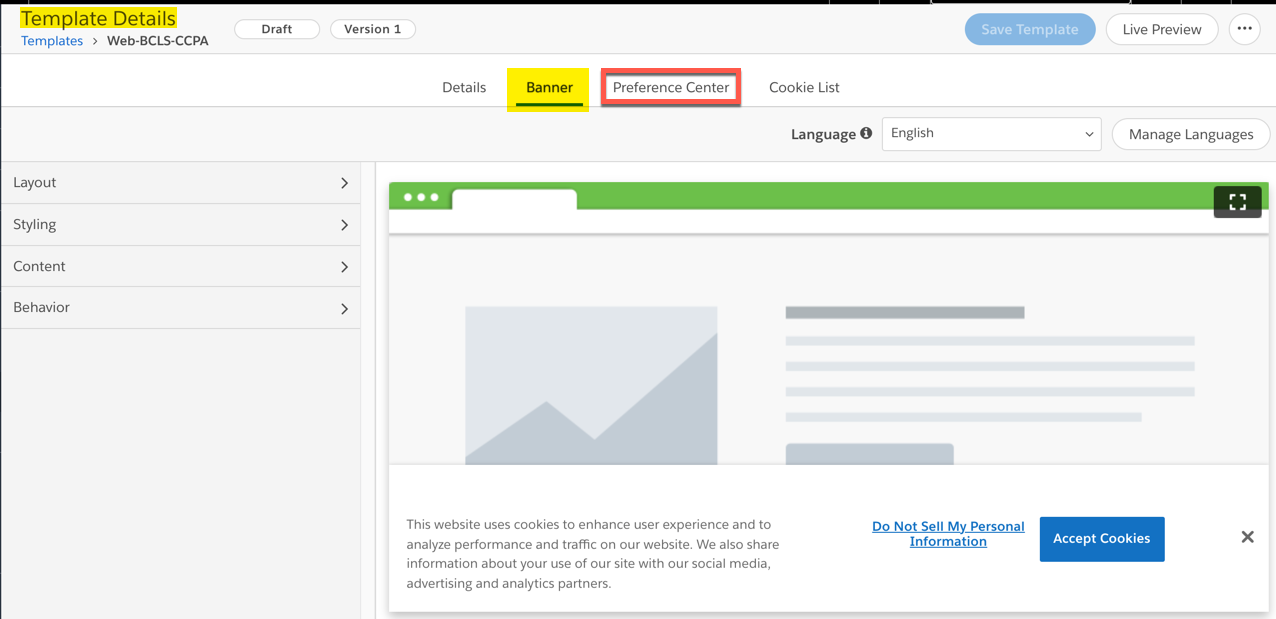
- In the Preference Center:
- Open the Styling options
- Enable Override Banner Styling
- Upload a new logo
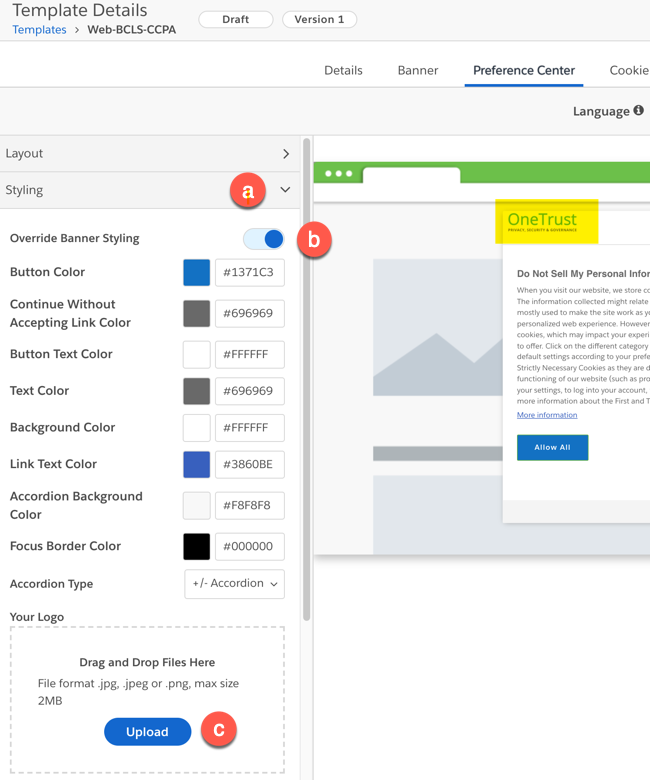
- Note that the logo is updated in the preview.
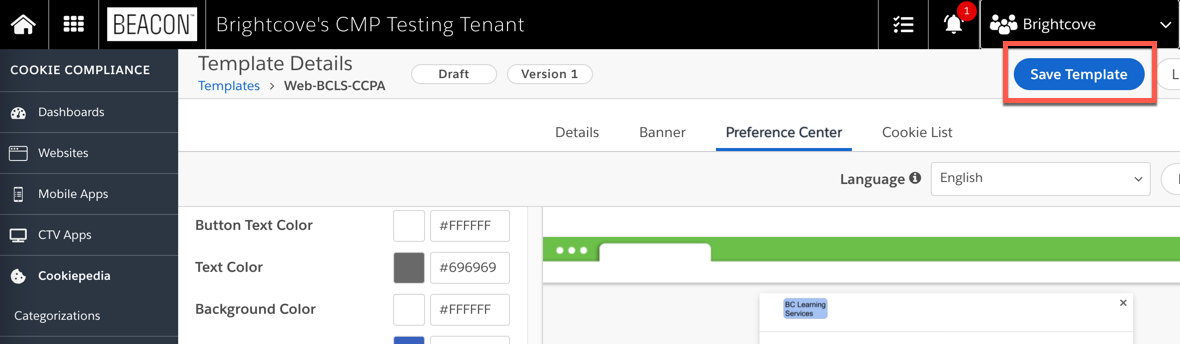
- Click Save Template.
- Click Templates in the left navigation.
- Click Add New to start creation of your second template.
- Select the IAB Transparency and Consent Framework 2.0 for the Framework.

- Click Next.
- Read the IAB TCF information then click I Agree.
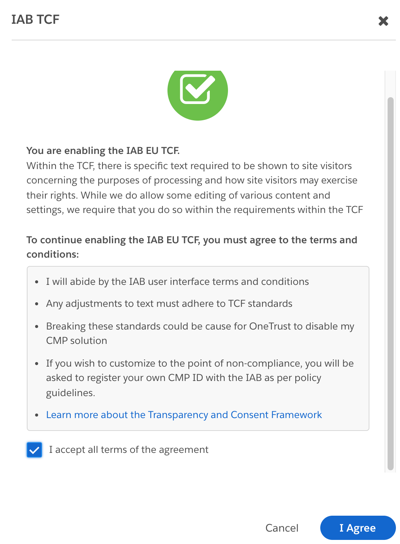
- Complete the form then click Create Template.
- Supply your company's logo for the banner, as shown in steps 11-13 above.
- While still in the Preference Center, open the Advanced Configuration options.
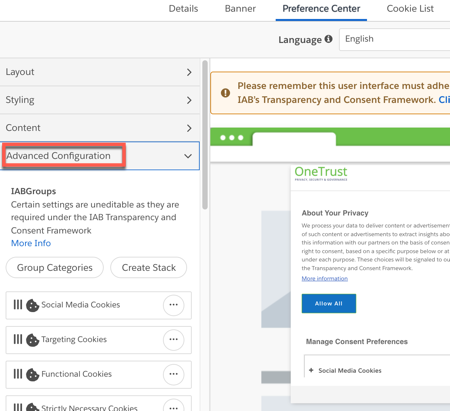
- A number of changes must be made here for use with Brightcove Beacon. The changes are listed, then a video follows showing the process how to implement those changes.
- Move Social Media Cookies to the Strictly Necessary Cookies subgroup.
- Move Targeting Cookies to the Strictly Necessary Cookies subgroup.
- Move Functional Cookies to the Strictly Necessary Cookies subgroup.
- Move Performance Cookies to the Strictly Necessary Cookies subgroup.
- From the Personalised ads and content, ad and content measurement, audience insights and product development group, perform the following:
- Remove Create a personalised content profile as a subgroup, then choose Disable IAB Purpose.
- Remove Select personalised content as a subgroup, then choose Disable IAB Purpose.
- Remove Measure content performance as a subgroup, but do NOT disable.
- Remove Apply market research to generate audience insights as a subgroup, then choose Disable IAB Purpose.
- Remove Develop and improve products as a subgroup, then choose Disable IAB Purpose.
- For Use precise geolocation data, choose Disable IAB Purpose.
- For Actively scan device characteristics for identification, choose Disable IAB Purpose.
- For Match and combine offline data sources, choose Disable IAB Purpose.
- For Link different devices, choose Disable IAB Purpose.
- For Receive and use automatically-sent device characteristics for identification, choose Disable IAB Purpose
- Check your configuration by comparing your results to the following, making corrections as needed:

- Click Save Template.
- Click Templates in the left navigation.
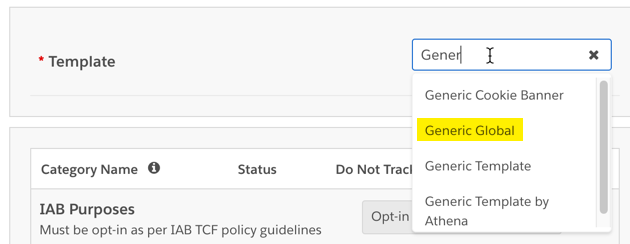
- Click Add New to start creation of your third template.
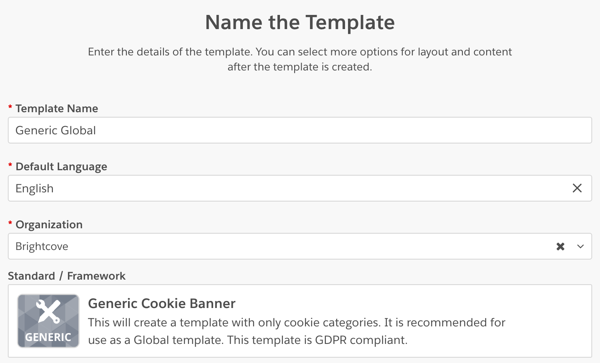
- Select the Generic Cookie Banner for the Framework.

- Click Next.
- Complete the form then click Create Template.
- Supply your company's logo for the banner, as shown in steps 11-13 above.
- Note that your banner now contains three buttons.

- You will now alter the look of your banner:
- Click the Banner tab
- Click Content
- Click Button Set
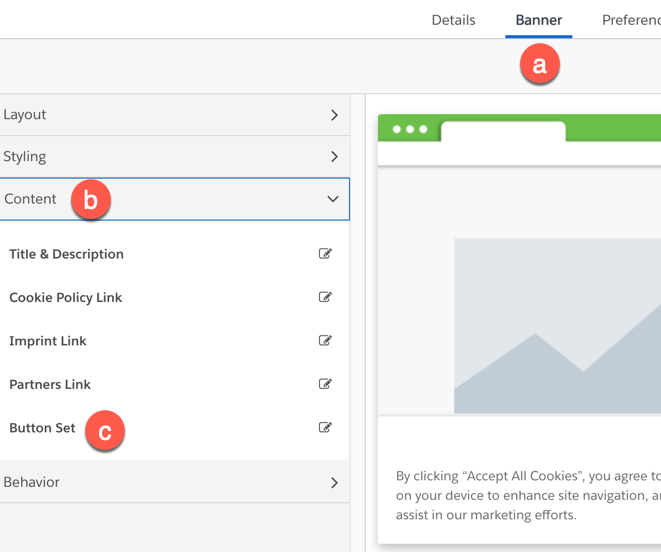
- In the Button Set dialog, disable the following buttons:
- Show Cookie Setting Button
- Show Reject All Button
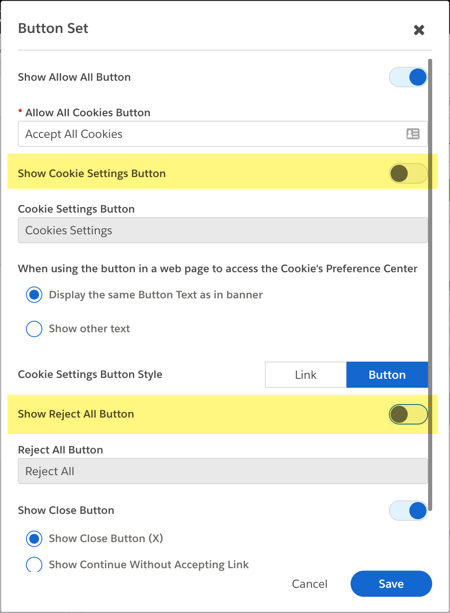
- Click Save.
- Note that the banner contains only the Accept All Cookies button and the close button (X).

- Click Save Template.
You have now created your three templates. Note that your Generic Global template will be used in regions NOT assigned to other templates.
Create geolocation rules
Creating geolocation rules first requires that you create a geolocation rule group. The group will act as a container for the rules you create. The actual geolocation rules define cookie compliance behaviors you wish for different geographic regions.
- To start the process, create a new rule group by:
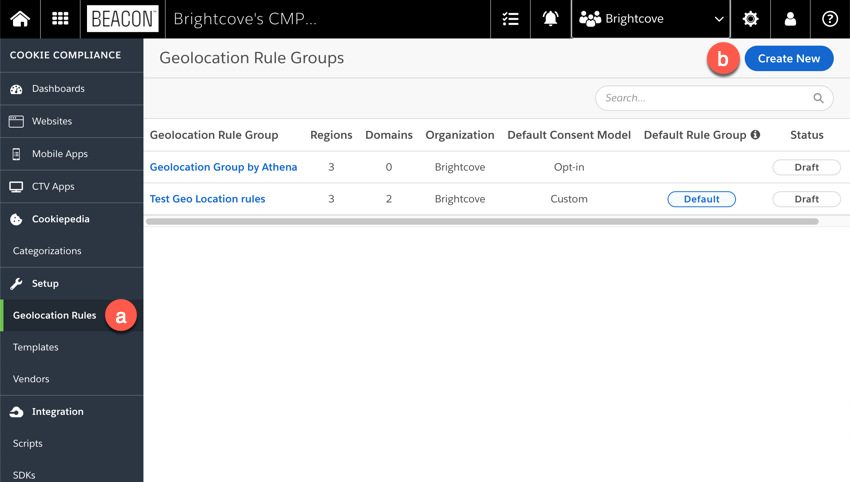
- In the left navigation, click Geolocation Rules.
- Click Create New.
- In the Create New Rule Group dialog, supply a group name, organization and description.
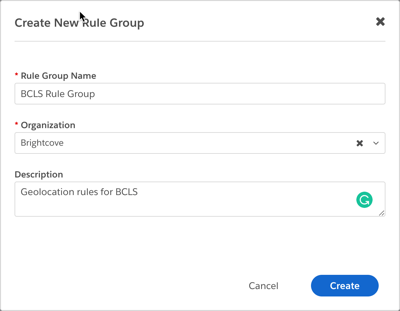
- Click Create.
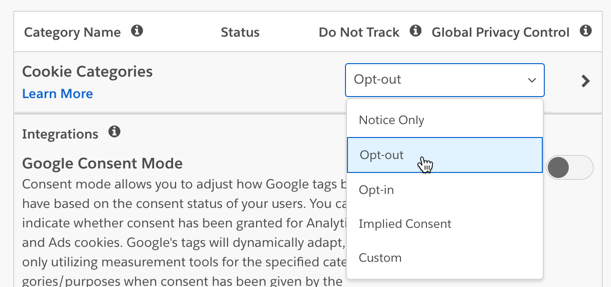
- To set the Global rule, start by clicking the edit button.
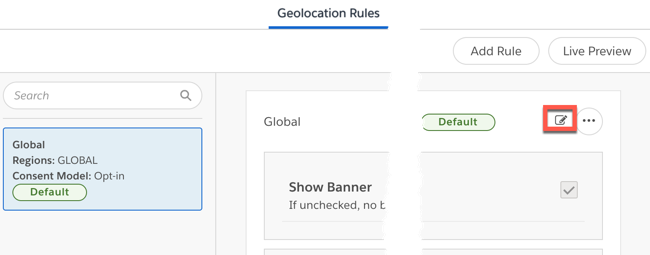
- Clear the Template input box and begin typing the name of your global template, created earlier, then select it.
- For the Cookie Categories, select Opt-out.
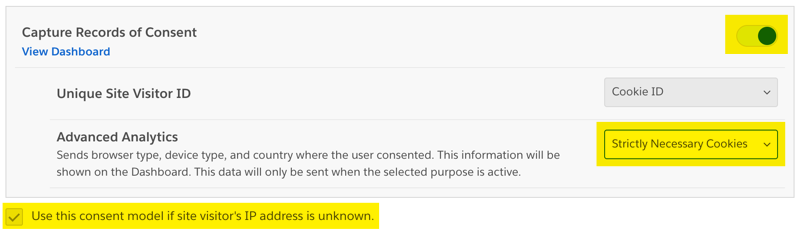
- For Capture Records of Consent change the following:
- Enable Capture Records of Consent
- Set Advanced Analytics to Strictly Necessary Cookies
- Consider checking the Use this consent model if site visitor's IP address is unknown checkbox if this rule acting in a global capacity.
- Click Save.
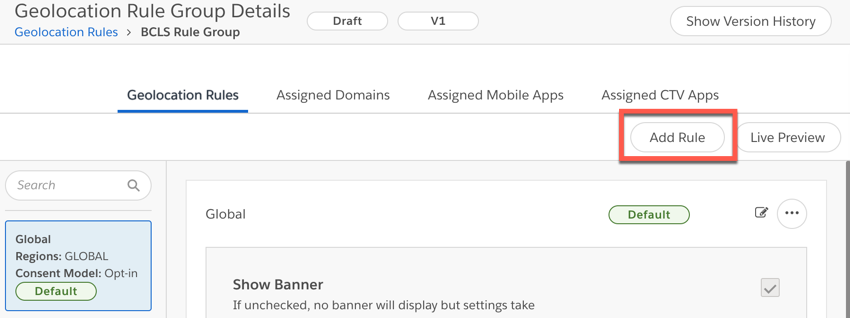
- To create your first actual geolocation rule, from the rule group details page, click Add Rule.
- You will now create the CCPA rule. The following table provides settings you need to make to be compatible with Beacon. Other changes can be made based on regulations for your targeted geographies.
Form element Value Rule Name Provide a name Regions For CCPA, you would most likely want to include California, then any other desired regions. Template Choose the template created that was based on the CCPA framework. Cookie Categories Opt-out Capture Records of Consent Enabled Advanced Analytics Strictly Necessary Cookies - Create the GDPR rule. Be sure to supply the following values to insure compatibility with Beacon. Other values can be set as needed to meet other regulations.
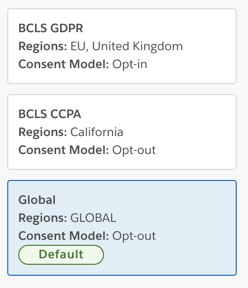
Form element Value Rule Name Provide a name Regions For GDPR, you would most likely want to include Eu and United Kingdom, then any other desired regions. Template Choose the template created that was based on the IAB framework. Cookie Categories Opt-in Capture Records of Consent Enabled Advanced Analytics Strictly Necessary Cookies - Check to be sure your rules appear as follows, except of course, using your rule names.
Assign geolocation rules to domains
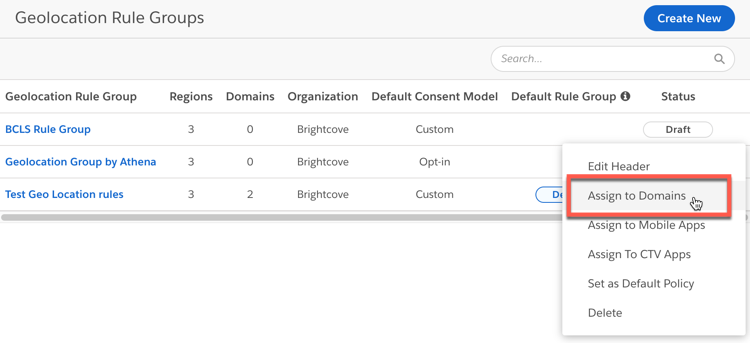
- In the left navigation, click Geolocation Rules.
- For the Geolocation Rule Group you created, click the ellipses icon and select Assign to Domains.
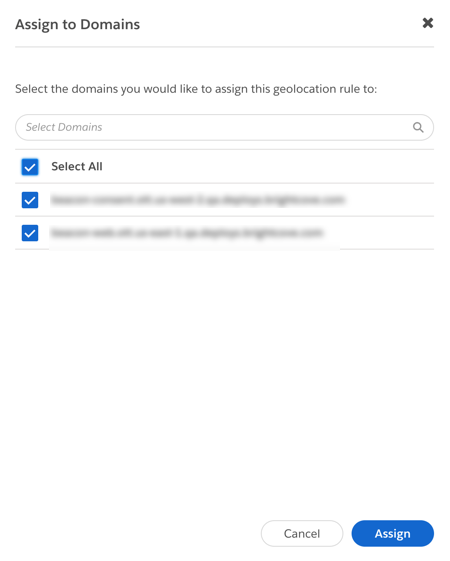
- Select the appropriate domains, then click Assign. These domains should match the URLs supplied by your DNS provider.
Create and copy scripts
You will go through the process of generating the scripts twice. Once for test scripts, which are used in the non-production test CDN. Then once for the production CDN.
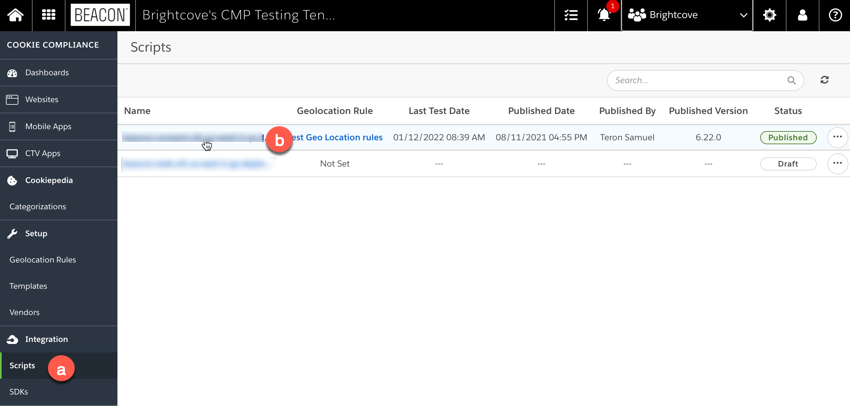
- From the Cookie Compliance index page:
- In the left navigation, click Scripts.
- Click the domain where your cookie compliance will be implemented.
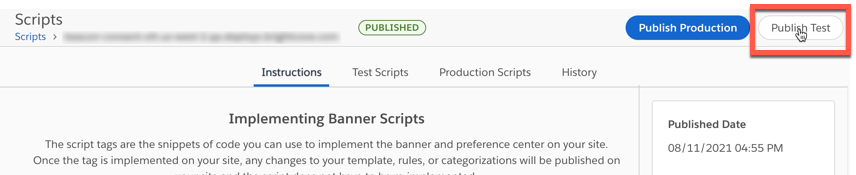
- In the details screen for your domain, click Publish Test.
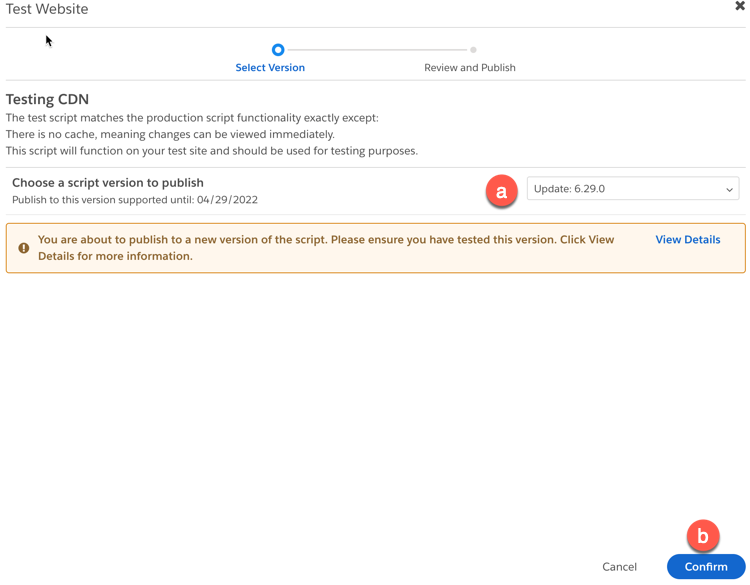
- In the Test Website dialog:
- Set the script version to 6.32.0 (or the latest version).
- Click Confirm.
- Ensure the settings are those in the following screenshot, then click Publish Test Scripts.
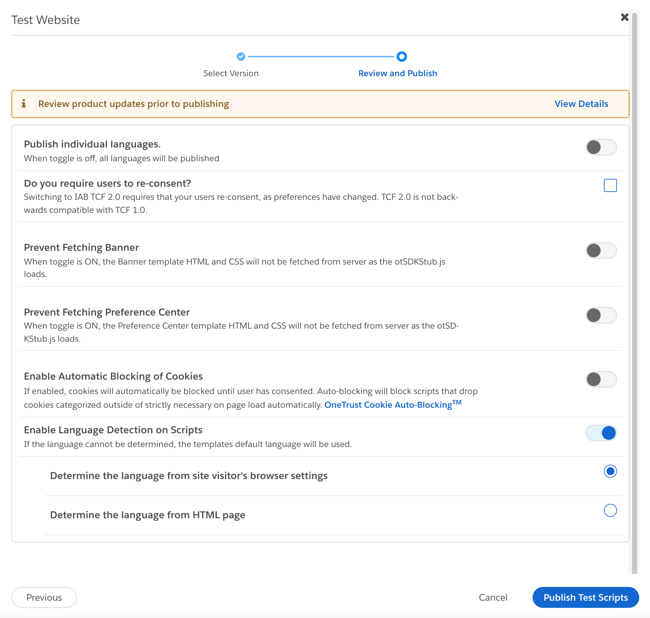
- If a Live Preview dialog displays, click Cancel.
- Now in the top-right of the screen, click Publish Production.
- Update the script version to the latest, and click Confirm.
- Confirm settings as show in step 56, then click Publish.
- Click the Test Scripts tab, if not already selected.
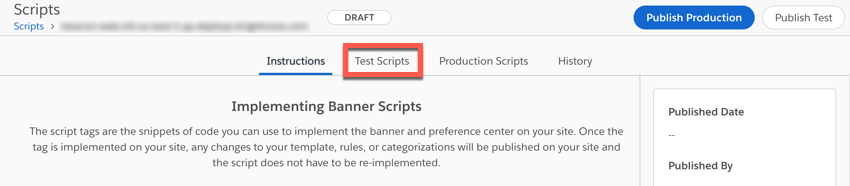
- Click Copy Scripts.

- Provide the scripts to Brightcove's OTT Delivery Team for proper deployment.
What data is collected?
Data is collected for the these main purposes:
- App behavior
- Analytics
- Ad targeting
The steps above configured your system to address these general purposes:
| Data | Use(s) |
|---|---|
| Geo-filtering | Location services |
| Device information (model, type, OS version) | Login, trace actions, analytics, record favorites, etc. |
| Ad targeting | Specified ads |
| Locale | Number and date formatting, currencies |
| App information (name, version, errors) | Reports on versions used, aggregated errors for proactive corrections, etc. |
| User navigation and use patterns | Google analytics (navigation patterns), sign ups, count search, page opens, etc. |
| Local storage | Persist credentials and login info, user application state, user settings, etc. |
Standards body purpose definitions
The purposes for cookie data collection are very thoroughly defined in the IAB Europe Transparency & Consent Framework v2.0. The definitions can be found in Appendix A: Purposes and Features Definitions of the IAB Europe Transparency & Consent Framework Policies document.
The IAB Europe Transparency & Consent Framework v2.0 defines 10 purposes. The following table displays those used by Beacon.
| Purpose | Name |
|---|---|
| 1 | Store and/or access information on a device |
| 3 | Create a personalised ads profile |
| 4 | Select personalised ads |
| 7 | Measure ad performance |
| 8 | Measure content performance |